 |
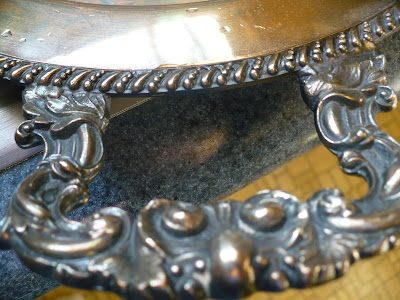
| Silver in early morning light |
I'd heard of this process of cleaning silver but I was skeptical until I saw the results Lanier showed on her blog (link below). It was gorgeous! Even then, it took awhile to decide to try it but the ugly tarnish on my silver service became the incentive.
Unlike my daughter, who loves the shabby chic look of tarnished silver... I like mine bright and shiny.
I used the process on my silver service yesterday and I loved the results so much, I decided to use it on my vintage silver plated flatware today and photograph the process.
By the way, the process also cleaned the hard water stains off my stainless steel sink! Kids would be fascinated with this process.
You will need:
- Aluminum Foil
- Baking Soda
- Boiling Water
- Dishwashing Detergent
- Lots of soft towels
First you want to line your sink with the aluminum foil
Then sprinkle one or two cups of baking soda over the foil. The first day, I used the old baking soda that had acted as a deodorizer in the refrigerator and it worked just fine.
 |
| I found the Arm & Hammer soda gave more fizzing action, even though it was older! |
Pour boiling water over the baking soda and aluminum foil. The first day I boiled water up to the halfway point of my stockpot (which is a small-ish stockpot) as I was cleaning large pieces of silver.
Today I only needed enough water to cover flatware so I boiled water to about 1/4th the way up the stockpot. I believe Lanier said she used a teakettle!
Watch the mixture get all bubbly and be amazed. Place your silver in the bubbles, you will need to keep turning your big items around so it all gets under the water. The flatware all fit at once.
Rinse your silver very well and then fill the sink with hot, sudsy water. This is an important step, you must wash the baking soda mixture completely off the silver.
Rinse just the amount of silver you can quickly dry. Dry each piece of silver and set aside.
One nice thing about this process, I was able to polish off some of the tarnish even while drying the silver as with the handle shown above.
These are some of the silver pieces after they've been polished with a soft towel... including the silver service at the top of the post.
I did have to put a few highly tarnished serving spoons through the process yesterday and today but all except one turned out bright and shiny the second time around. Even the one that wasn't shiny looked a lot better than it did.
I invested about a half an hour the first day and an hour or more the second. That was because I decided to clean and shine all the flatware in the case. I love the vintage look of that flatware, it was a garage sale purchase years ago!
To view the post at Lanier's Books which inspired all of this... mosey on over here.


7 comments:
Yes, I love this method. I like both polished and tarnished silver. (I imagine that even your daughter cleans the silver every now and then. Black silver is not so good.)
I'm going to try this... I'm ashamed for anyone to see my silver so I keep it hidden! I'd love to show it off...
Every time I come here it looks different! :)
I've wondered if this worked. I'm so excited to know that it does because silver polish is nasty smelly stuff.
I like mine shiny too!
I have a few silver pieces and while i have heard of this too, being a home educator of course, I never have tried it! I think I will give it a try and have my girls and Kyle help me....they would love it and it would be science in action!
Deanna
I hear putting a piece of chalk in the silverware container helps it not tarnish so bad.
Linda
Must keep this in mind! I love silver, and I love brightly polished silver!!!!
Your silverware is the same pattern as my mother's! My grandmother bought it years ago with Betty Crocker coupons.
Post a Comment